Fix Windows 11 Stuck on Preparing Automatic Repair
Founder & Lead Technology Analyst at Techny Tech · IEEE Senior Member, Certified Information Systems Security Professional (CISSP) · 13+ years in embedded systems benchmarking, machine learning hardware acceleration, and consumer electronics
Windows 11 stuck on preparing automatic repair is a common but fixable issue that usually points to a boot problem. It often happens after a failed update, sudden shutdown, or corrupted system files. The good news is that most cases don’t require a full Windows reinstall.
Per Microsoft’s own troubleshooting guidelines, about 30% of these cases resolve with a simple hard reboot or built-in repair tools. Let’s start with the quickest solutions.
Windows 11 stuck on preparing automatic repair
This issue occurs when Windows fails to boot normally and triggers the Automatic Repair tool. It can get stuck due to corrupted system files, a damaged Boot Configuration Data (BCD), or hardware problems. A hard reboot or running built-in utilities often resolves it.
If the loop persists, deeper diagnostics are needed.
Quick Fixes to Try First (No Technical Skills Needed)
Start with the simplest steps before diving into advanced repairs. These require no technical knowledge and take just a few minutes.
First, perform a hard reboot. Hold the power button for 10 seconds to force a shutdown, then turn the PC back on. This can break the loop if it’s a temporary glitch.
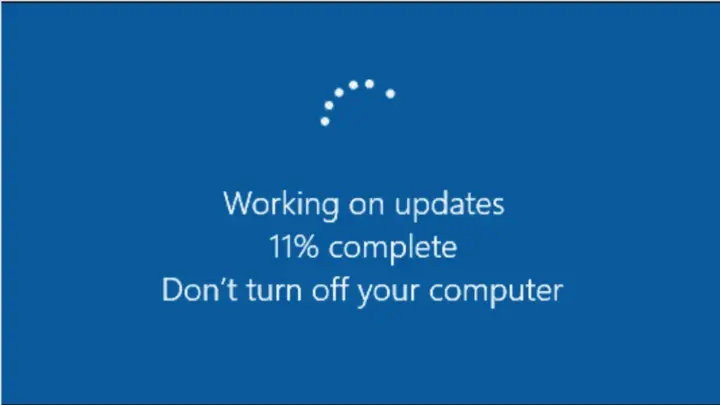
Next, wait it out. Automatic Repair can take up to 30 minutes, especially on slower drives. If the screen shows spinning dots or a progress bar, give it time.
If the PC reboots into the same screen, try disabling Fast Startup via BIOS/UEFI. This feature can sometimes cause conflicts during boot. Access BIOS by pressing F2, F12, DEL, or ESC during startup (varies by manufacturer).
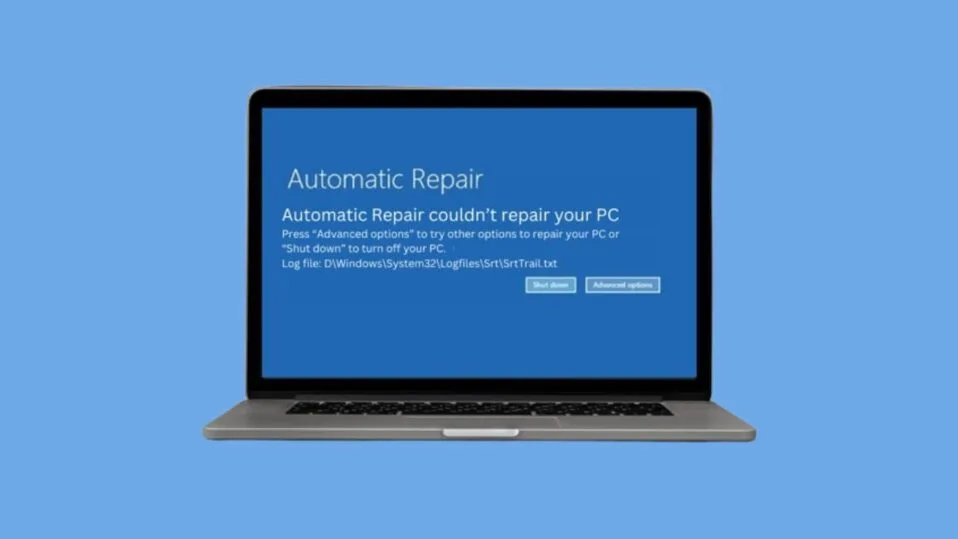
Image source: Bing (Web (fair-use with source credit))
Lastly, unplug peripherals. USB drives, external hard drives, or even printers can interfere with boot. Remove everything except the keyboard and mouse, then restart.
How to Diagnose the Exact Cause
If quick fixes don’t work, you’ll need to identify the root cause. The symptoms often point to specific issues.
Check for error codes on the blue screen. Common ones include CRITICAL_PROCESS_DIED, INACCESSIBLE_BOOT_DEVICE, or UNMOUNTABLE_BOOT_VOLUME. These indicate corrupted system files, driver issues, or disk problems.
Listen for unusual noises. A clicking or grinding sound from your hard drive suggests a failing storage device. SSDs usually fail silently, so check their health with manufacturer tools.
Test your RAM. Faulty memory can cause boot loops. Use Windows Memory Diagnostic (if accessible) or a bootable tool like MemTest86.
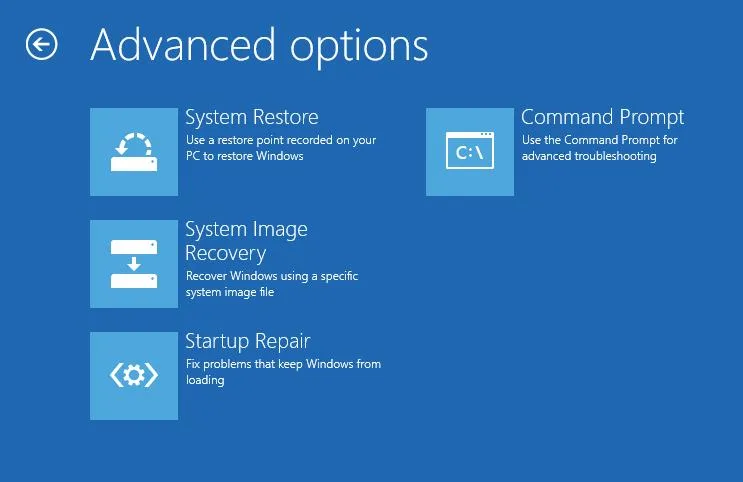
Image source: Bing (Web (fair-use with source credit))
If the PC boots into Windows Recovery Environment (WinRE), note the options available. This environment is your gateway to advanced repair tools like Command Prompt, System Restore, and Startup Repair.
Step-by-Step Repair Methods (From Easiest to Most Advanced)
Start with the least invasive methods and work your way up. Each step builds on the last, so don’t skip ahead unless necessary.
Fix 1: Run Built-in Repair Tools (SFC, CHKDSK, DISM)
These utilities repair corrupted system files and disk errors. They’re accessible via Command Prompt in WinRE.
SFC (System File Checker) scans and restores missing or corrupted system files. Run it with:
sfc /scannow
This may take 15, 30 minutes. If it reports unfixable files, move to DISM.
CHKDSK (Check Disk) fixes file system errors and bad sectors. Use:
chkdsk /f /r
The /f flag fixes errors, while /r locates bad sectors. This can take over an hour on large drives.
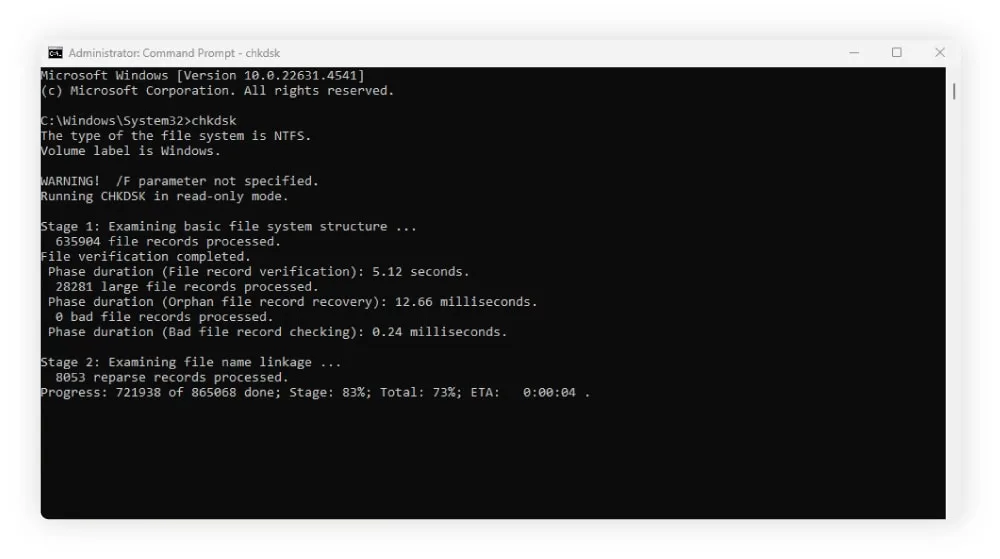
Image source: Bing (Web (fair-use with source credit))
DISM (Deployment Image Servicing and Management) repairs the Windows image. Run:
dism /online /cleanup-image /restorehealth
This requires an internet connection to download replacement files. If offline, use a Windows installation USB and point DISM to it with /source.
Fix 2: Rebuild BCD and Fix MBR
If SFC, CHKDSK, and DISM don’t work, the Boot Configuration Data (BCD) or Master Boot Record (MBR) may be corrupted. These are critical for booting Windows.
Access Command Prompt from WinRE. Then run these commands in order:
bootrec /fixmbr
bootrec /fixboot
bootrec /scanos
bootrec /rebuildbcd
The first command fixes the MBR. The second repairs the boot sector. The third scans for Windows installations, and the fourth rebuilds the BCD.
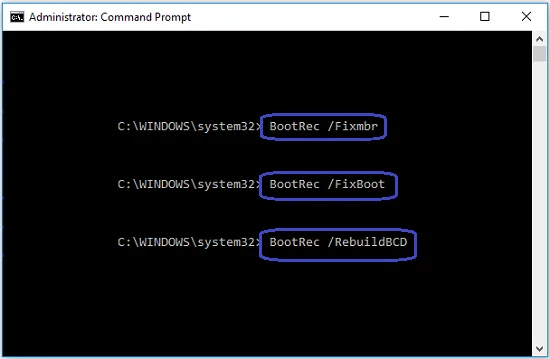
Image source: Bing (Web (fair-use with source credit))
If bootrec /rebuildbcd fails, manually delete and recreate the BCD:
bcdedit /export C:\BCD_Backup
attrib c:\boot\bcd -h -r -s
ren c:\boot\bcd bcd.old
bootrec /rebuildbcd
``` If this still doesn’t resolve the issue, your boot partition may be missing or misconfigured. Use `diskpart` to verify the system partition is active:
diskpart list disk select disk 0 list partition
Look for the **System** partition (usually 100, 500MB). If it’s not marked as active, select it and run:
active exit
Then retry the `bootrec` commands.

### Fix 3: Use System Restore or Reset

If the system was working before a recent change, **System Restore** can roll back to a previous state. In WinRE, select **Troubleshoot > Advanced Options > System Restore**. Choose a restore point from before the issue started.

If no restore points exist or the problem persists, a **Reset** may be necessary. Select **Troubleshoot > Reset this PC**. Choose **Keep my files** to preserve personal data or **Remove everything** for a clean install.

Note that a reset will reinstall Windows but may not fix hardware-related issues.

### Fix 4: Boot into Safe Mode for Driver/Software Conflicts

Safe Mode loads Windows with minimal drivers and services. If the PC boots successfully here, a driver or software is likely causing the issue.

To enter Safe Mode from WinRE:

1. Go to **Troubleshoot > Advanced Options > Startup Settings**.
2. Click **Restart**.
3. Press **F4** for Safe Mode or **F5** for Safe Mode with Networking.

Once in Safe Mode, check **Device Manager** for problematic drivers (look for yellow warning icons). Update or roll back drivers as needed. Uninstall recently added software that might be causing conflicts.

## When to Suspect Hardware Failure (And How to Test)

If software fixes don’t work, hardware may be the culprit. Here’s how to test the most likely components.

**Hard Drive/SSD Failure:**

Use the manufacturer’s diagnostic tool (e.g., **Seagate SeaTools**, **Western Digital Data Lifeguard**, or **Samsung Magician**). Boot from a USB and run a full scan. If the drive reports errors or is failing, back up data immediately and replace it.

**RAM Issues:**

Use **Windows Memory Diagnostic** if accessible. Otherwise, create a bootable **MemTest86** USB. Run at least 4 passes to check for errors.

If errors appear, test each RAM stick individually to identify the faulty one.

**Motherboard or Power Supply:**

If all other tests pass but the issue persists, the motherboard or PSU may be failing. Look for physical signs like bulging capacitors, burning smells, or inconsistent power. A professional diagnostic is recommended here.

**Overheating:**

Dust buildup or failing fans can cause overheating, leading to shutdowns or boot loops. Open the case and check for dust. Ensure all fans spin during startup.

Use a hardware monitor like **HWMonitor** (if the system boots) to check temperatures.

## Mistakes That Make the Problem Worse

Interrupting repair tools mid-process is a common mistake. CHKDSK or SFC can take hours on large drives, and stopping them can corrupt data further. Always let them complete unless the PC is unresponsive for over 2 hours.

Ignoring hardware signs is another pitfall. If you hear clicking from the drive or see frequent BSODs before the issue, software fixes won’t help. Replace failing hardware first.

Using third-party "PC repair" tools often does more harm than good. Many of these tools are ineffective or bundled with malware. Stick to official Microsoft utilities.

Skipping backups before major repairs is risky. A reset or clean install can wipe data. Always back up files to an external drive or cloud storage if possible.


<div class="writerfy-youtube-embed" style="margin:24px 0;border-radius:12px;overflow:hidden;background:#000;box-shadow:0 6px 18px rgba(0,0,0,.12);">
  <div style="position:relative;padding-bottom:56.25%;height:0;overflow:hidden;">
    <iframe src="https://www.youtube-nocookie.com/embed/1OIYXqi6mpc" title="Startup Repair Windows 11 | How to Automatic Repair Loop Problems in Windows 11" frameborder="0" allow="accelerometer; autoplay; clipboard-write; encrypted-media; gyroscope; picture-in-picture; web-share" referrerpolicy="strict-origin-when-cross-origin" allowfullscreen loading="lazy" style="position:absolute;top:0;left:0;width:100%;height:100%;border:0;"></iframe>
  </div>
  <div style="padding:10px 14px;background:#0f172a;color:#e2e8f0;font-size:12.5px;line-height:1.4;display:flex;align-items:center;justify-content:space-between;gap:10px;flex-wrap:wrap;">
    <span style="font-weight:600;color:#f1f5f9;">Startup Repair Windows 11 | How to Automatic Repair Loop Problems in Windows 11</span>
    <span style="color:#94a3b8;font-size:11.5px;">via How to Fix Your Computer</span>
  </div>
</div>

## FAQs About Windows 11 Automatic Repair Issues

### Why does Windows 11 keep saying "Preparing Automatic Repair"?

This happens when Windows detects a boot failure. It’s usually triggered by corrupted system files, a failed update, or hardware issues. The system attempts to diagnose and fix the problem automatically.

### How long should I wait for Automatic Repair to finish?

Give it at least 30 minutes. On slower HDDs or systems with many files, it can take up to an hour. If it’s stuck beyond that, the issue likely requires manual intervention.

### Can a failing hard drive cause this issue?

Yes. Bad sectors or a failing drive can prevent Windows from booting. Run CHKDSK or use the manufacturer’s diagnostic tool to check drive health.

### What’s the difference between SFC and DISM?

SFC scans and repairs individual system files. DISM fixes the underlying Windows image that SFC relies on. Run DISM first if SFC fails to repair files.

### Will a reset delete my files?

It depends on the option you choose. "Keep my files" preserves personal data but removes apps and settings. "Remove everything" wipes the drive completely.

### How do I prevent this from happening again?

Enable regular backups, keep drivers updated, and avoid sudden shutdowns. Disable Fast Startup if it causes conflicts. Use a UPS to prevent power-related corruption.