The Internet is a basic need that violates our whole routine if it has any issues. Be it while taking online classes or doing online work, reading a book, or seeing images by connecting phone, any problem with the Internet is significantly annoying.
Particularly, With Wi-Fi users’ the issue is wifi connection but no internet. Ah man, it sucks when you are trying to send text mail while using the internet. So, how to solve it? What causes it? And the way you can save your device from this issue in the future?
Everything is put together at the place you’ve landed in. All you have to do is to be with me till the article finishes. I bet when you’re done reading this article, the wifi issue will have been resolved.
Without bragging more, let’s dive right in.

Why does the “Wifi Connected but No Internet” Error Appear on your Screen?
It’s a sort of a warning triangle that pops up on your screen. It may be written differently depending on the device you’re using.
You’ll see it with a black exclamation mark on windows, while on Android and iPhones, it may have different forms.
Like, No internet connection, Connected no internet access, WiFi connected but no internet, and Connected, no internet access.
When this error pops up on your screen, it means that in the LAN(Local area network) that your device is connected with(Router or modem), there is an issue that’s blocking the reach of the internet from the modem to the device. It may happen because of the below-mentioned causes.
- Chances are the Wifi adapter is faulty.
- The Security software keeps your device from getting access to the internet.
- Wireless drivers are outdated.
- The DNS server settings are not set up correctly.
- DNS may have too much cache which is causing this error.
- The computer’s IP address is not correct
- or the router itself has any issue.
Now you’re aware of the causes that cause” Wifi connected but no Internet issue. It’s time to head to the solutions to the problem.
There are many ways that you can pursue to get the issue resolved. However, the ones that are self-tested and proven are mentioned below.
Follow each carefully and if the one doesn’t work, then try another one; I hope your problem will get solved after going through this guide.
1) Troubleshoot the Router
No doubt, the Built-in troubleshooter feature is excellent when the software programs are faulty. Like, if there is an issue with the IP or something becomes a barrier between the way of the Internet connection and device.
It helps you with this problem. When you’re encountering the Wifi connection and no Internet issue or any other Internet-related question, just troubleshoot the machine, and you’ll get a booming Internet.
Troubleshooting:
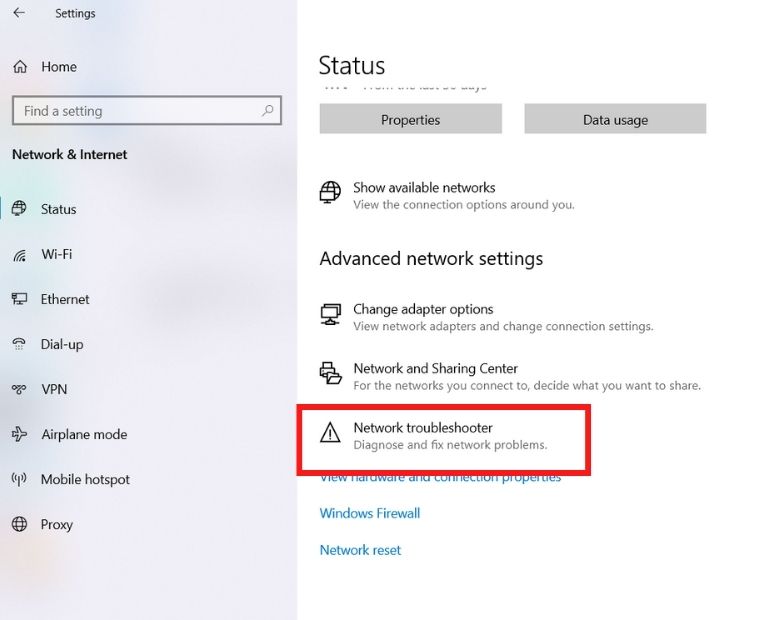
- Head over to the search bar of your computer and type settings
- Hit it and flip over to the option of network & internet”.
- There will be an optional called Status. Click on it.
- Now, the network troubleshoot option should appear on the screen, run it simply, and if it solves the problem or not.
2) Set the DNS Servers
Mostly, when the DNS servers are down, or they have any issue, they tend to create wifi errors. Then you should attempt to set up a decent DNS server.
Typically, when you associate with any Internet connection, the router will advise your gadget what DNS server to utilise. By specifying a DNS server statically, we recommend that our PC constantly utilise that specific server.
Luckily, changing the DNS settings is not a big deal. You can easily do it just by following the below-mentioned steps.
- Click on Start and select Network Connections
- Select Change Adapter Options

- Open your Network Adapter by double-tapping on the Wi-Fi Adapter

- Tap Second click and go to Properties
- Select Internet Protocol adaptation 4 (TCP/IPv4), and afterward, Properties.

- Some boxes will be there. Check them all and put the following mentioned DNS servers.
- Put the DNS-Server: 8.8.8.8 and for substitute DNS-Server 8.8.4.4
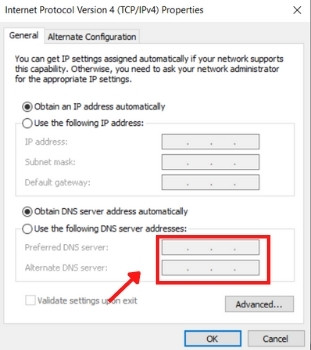
Now, some of you must be thinking about what these numbers are. Let me tell you; these are the fastest and the most secure DNS servers in the world because they’re from Google.
When you put them on your computer, they improve the Internet speed by a lot of percent. Also, they take care of your privacy and don’t leak your data. So, using this DNS server on your pc is highly recommended.
3) Update the Outdated Drivers
When the drivers of the computer are not updated, such network errors are common for any Internet network.
So, how to update drivers, below are mentioned all the easy steps that you have to follow:
- Press Windows key + X
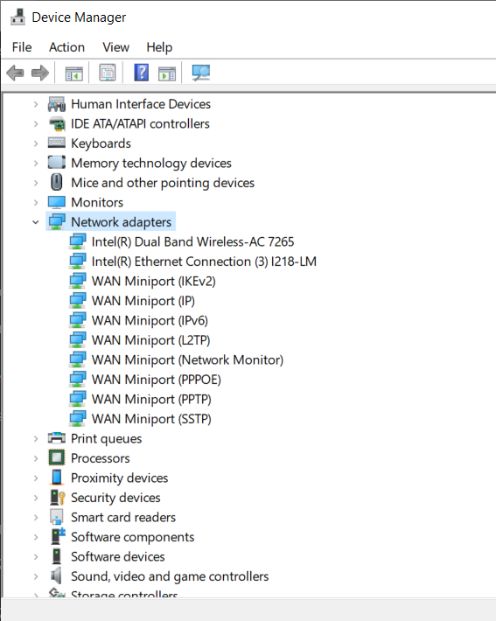
- Select Device Manager
- Click on the little arrow option to expand the “Network adapters”
- Search for your Wireless network connector
- Right-click and select Update Drivers
- Select Search consequently for refreshed driver software
- Windows will look for a more up-to-date driver and introduce it.
Sometimes windows are not able to find the newer drivers, so you can head over to the site of your computer’s manufacturers, like Lenovo and HP, and see if there is any update for your pc.
4) Disable your Antivirus or any Security App Installed on the PC
Antiviruses are for keeping the computer safe from viruses and bugs. However, the antivirus is the thing that causes most Internet-related issues. SO disable the antivirus or any security app installed on your pc.
This may get the issues resolved. However, if it doesn’t solve the issue, then don’t worry. There are other ways also that can solve your problem.
5) DNS Cache
DNS cache can also be the cause of the Wifi connection, but no Internet problem in your pc. You can clean the DNS to guarantee it isn’t bringing any issues to the computer.
Head over to the Windows start menu and type ‘cmd’ to open Command Prompt and run it with the administrator. Type this ipconfig /flushdns command in the CMD prompt. If the DNS caches were creating the problem then it would definitely get solved by this process.

6) Check your Computer’s Time and Date
It’s a simple step, but most people overlook it thinking what can this small thing do.
Look, when you browse the internet on your computer, for you it’s just about putting your query on goggles and getting the results but at the backend, there are a lot of operations done.
When the time and date of your PC are incorrect, it manipulates the operations and eventually stops them, which causes this Wifi connection but no Internet issue.
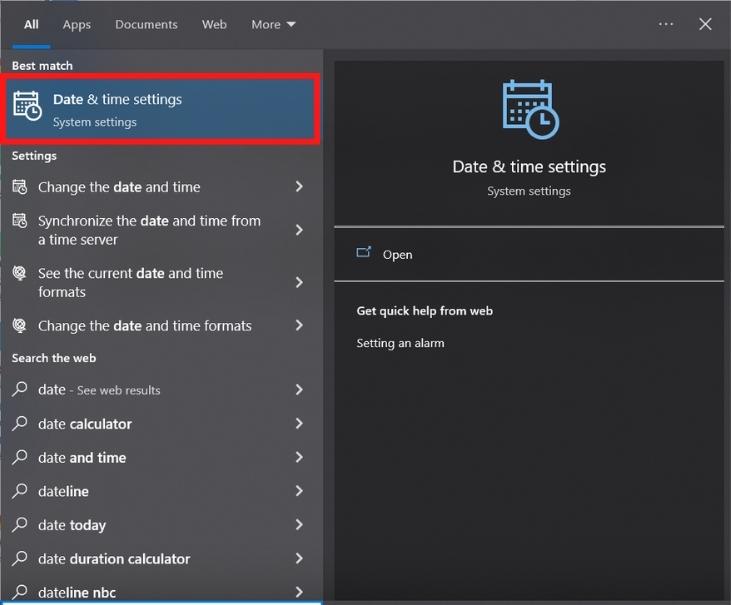
There is a timestamp between your computer and the Internet that gets the process done, so incorrect dates and times won’t let you use the Internet.
So, make sure, whenever you’re having this issue, do check the date and time and then do something else. If they’re incorrect, immediately correct them and then restart your pc. Hopefully, it will solve the issue.
7) Make sure the Fast Startup are disabled
Many people are impatient and use Fast startup features to make the process of shutting down and turning on faster. This thing sometimes causes Different issues with wifi connection and the Internet connection. So, consider disabling it.
Method
- Flip over to the windows search bar and type Run, open it.
- When the search box opens, type this “powercfg.cpl” command and hit Enter.
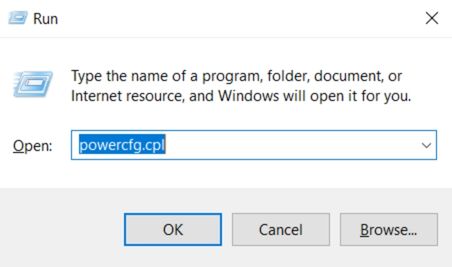
- The Power options will open up.
- On the left side, hit on the “Pick what power buttons make”.
- You’ll be able to see the “Change settings currently unavailable.” under the define section; click on it.
- There will be an option for the quick startup will appear under the closure settings.
- It is usually checked, just uncheck it and save the settings.
- And then, restart your pc, and hopefully, you’ll have Internet access.
8) Check the Validity of your IP Address.
Your PC might have an inaccurate IP address which blocks it from web access that’s why it gives the error of wifi connected but no internet. A typical motivation behind why you could have an invalid IP is a result of a fixed location set in Windows settings.
If you want to set your IP to a specific incentive for a particular explanation, the best practice is to train Windows to acquire an IP address and a DNS server address from your switch or mode.
Method
- In the base right-hand corner of your screen, right-click on the association image in your taskbar and select the “Open Network and Internet Settings” decision.
- Change Adapter Options should appear. Click on it and then double-click on your network.
- In the window that opens, select “Properties” at the base, then find and twofold tap the part named “Web Protocol Version 4”.
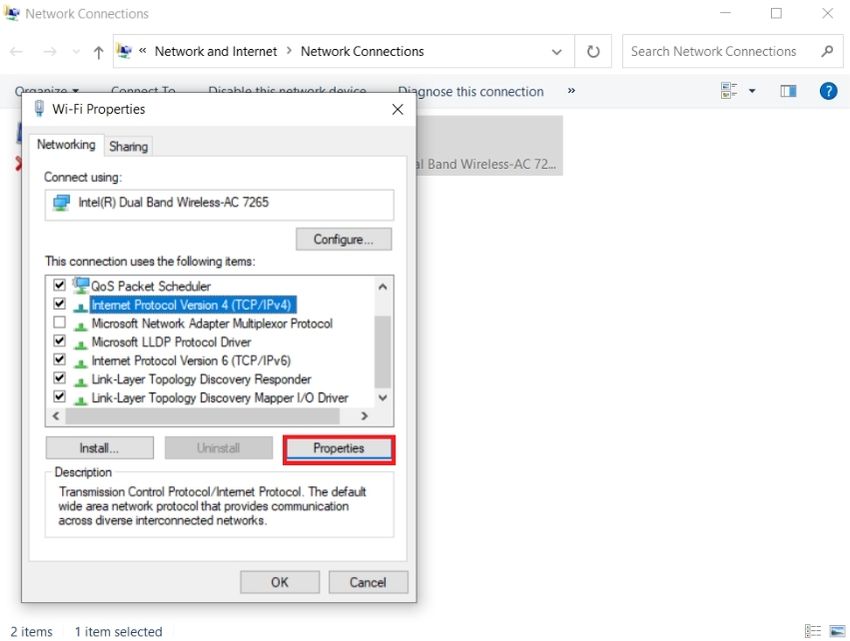
- Consequently, guarantee that both the IP address and DNS server address are set to be obtained subsequently, then hit OK and endeavor your web affiliation again.
Point to note
As you’ve read this article till here, I hope now you know how to solve “Wifi connected but No Internet issue.
Also, you do have basic knowledge of the things related to an Internet connection. I’ve mentioned everything clearly so that you don’t hassle while understanding things.
Still, if you have any queries related to the topic, put that down in the comment section and I’ll be there to help you out.
Now, it’s your turn. How long have you been encountering the issue? Your answer will be highly appreciated.

Leave a Reply